Renaissance Site Set Up
STEP BY STEP
Getting your site ready
This page will provide step-by-step instructions to ensure your site is set up correctly. Paired with the information from the Training Team, you’ll be able to set your site up and have students logging on soon.
Preparing your School Site
When logged in as a School Network Level Administrators or School Network Staff
Homepage > User Profile in the top right corner > Manage Apps & Users > School Calendar > School Years > Add a School Year > Input Start and End Dates, as well as First and Last Day for Students > Save
When logged in as a School Network Level Administrators, School Network Staff, School Level Administrators, School Staff, Teachers
Homepage > User profile in the top right corner > Manage Apps & Users > School Calendar > Screening Windows > Add School Network Screening Windows (we recommend testing over a two week period, once every term)
Please note: if you are completing this process before 1st January you will need to select ‘Work in a Different School Year’ and select the 2024 year. If you are doing this, do not navigate away from the School Calendar, only use the in-site < Back button.
When logged in as a School Network Level Administrators, School Network Staff, School Level Administrators, School Staff, Teachers
Homepage > User profile in the top right corner > Manage Apps & Users > School Calendar > Marking Periods > Add a Marking Period > Enter Name and Date Range > Add
Please note: if you are completing this process before 1st January you will need to go to School Years > Work In > 2024.
If you are doing this, do not navigate away from the School Calendar, only use the in-site < Back
When logged in as a School Network Level Administrators, School Network Staff, School Level Administrators, School Staff, Teachers
Homepage > User profile in the top right corner > Edit Preferences > Dates and Times for Accelerated Reader > Enter Before & After Dates & Times > Save Changes
Please note: if you are completing this process before 1st January you will need to select ‘Work in a Different School Year’ and select the 2024 year.
If you are doing this, do not navigate away from the School Calendar, only use the in-site < Back button
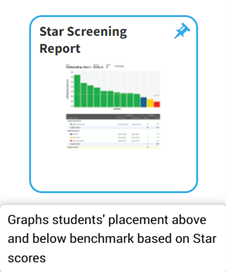
Reports to Download
This report contains intervention progress information – helpful for teachers who will be working with the same intervention students next year or for sharing with those teachers who will be providing intervention to your current students next year.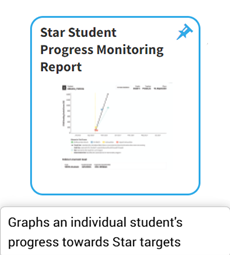
This report cannot be generated for a previous school year. Therefore, we encourage teachers to save a copy at the end of the current school year for all screening periods so they can continue to benefit from and compare data.
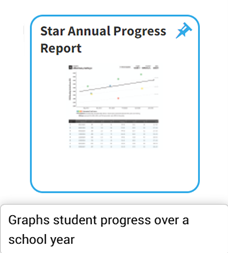
This report displays a student’s progress across a school year compared to a National Norm Reference or a year-end target.
Populating courses and classes
To populate your Courses and Classes, you will be required to complete the template below. The step-by-step Renaissance Import Guide and the videos below will explain how to successfully populate the template and import the complete file into your Renaissance site.
When using the Renaissance Student Data Template, all Green columns are mandatory, all Yellow columns are highly suggested, and columns with no colour are optional. When files are completed and saved as CSV, highlighting will disappear.
Frequently Asked Questions
Answers to the most common questions relating to new year rollover.
Can I complete the rollover in 2023 or do I need to wait until next year?
You can add your 2024 school dates and upload your classes to the school year if they’re finalised. We advise waiting until you return to school to set up Screening Windows and Accelerated Reader Date and Time restrictions as they may interfere with the current settings
Why don’t I have the option to add/edit the new school year?
Only the admin account will allow you to edit the new school year; please contact your site administrator.
I am trying to import my student file, but I am getting an error message
Please ensure your file is saved in CSV format and that you have selected the correct headers for each column as they appear in your spreadsheet. If you are still experiencing issues, please get in touch with [email protected] for a secure link to upload your file. We will then be able to assist with the import.
(Please Note: this process could take up to 3 days to complete during high volume periods.)
My classes are the same as last year. How do I copy over the existing classes to the new school year?
You can copy classes from the previous school year using the New School Year Wizard and following the prompts.
I’ve copied data over, but the students have not moved up a year
The student’s year groups will automatically update once the new school year starts.
Students are receiving an error message stating ‘You do not have Products assigned. Please see your teacher’.
You can assign products to classes by: Homepage > Profile > Manage Apps & Users > Classes & Courses > Select the ‘Only show classes not set up’ button > Tick box next to Course Name > Select ‘Assign Products’ button at bottom and select the products you’d like to assign to your class
If students are not enrolled in a class, do they take licenses?
Students only take a license if they have used the product in the current subscription period or academic year, you can view a list of students who hold a license by going to the Homepage > Profile > Manage Apps & Users > Product Administration > Subscriptions & Capacity > Click the number of “used” licenses highlighted in blue in the brackets.
Our classes are more significant than last year, and we require more student subscriptions.
Please get in touch with [email protected] or your Business Development Manager to request a quote for additional students.
Why do I need to set AR Date and Time Restrictions?
Setting these restrictions will ensure students cannot complete Accelerated Reader quizzes outside of school hours/days to ensure the data gathered is an accurate reflection of their abilities.
Why do I need to set Star Reading Screening Dates?
Your screening dates are your reporting periods. We recommend conducting Star testing once each term, during a two-week period (although this can be extended should students need to sit testing outside of these two weeks). Once testing is completed you can select a specific screening period to report on and determine all student results within that period.
Students are receiving an error message stating ‘You do not have Products assigned. Please see your teacher’.
You can assign products to classes by: Homepage > Profile > Manage Apps & Users > Classes & Courses > Select the ‘Only show classes not set up’ button > Tick box next to Course Name > Select ‘Assign Products’ button at bottom and select the products you’d like to assign to your class.
We have Star tested students before the Christmas holidays and now the system will not let me set targets.
We suggest testing students at the start of the new school year to account for any regression or summer slide students may have experienced. You can then set targets that reflect what students are capable of.

Preparing Freckle for the new year
If you would like students to access Freckle over the holidays, you can wait until the new school year begins to make your updates.
To ensure your rosters are up to date at the beginning of the school year, Freckle will automatically promote your students to the next grade level. You will simply need to update your class rosters for the new year using either of these options:
1. Teachers can transfer a student or roster to another teacher. If you choose this option for existing students, you can then use the following instructions to import new students or add them manually.
2. The Freckle Administrator can update your Freckle Student, Teacher, Class and Enrolment templates and import them into your site. You can list both existing and new students and teachers on the same files.
Please review the following information to ensure your files are completed correctly, and follow the instructions to import the files into your Freckle site.
Don’t forget, the Renaissance Customer Support team is available to chat, Monday to Friday, 8am – 4:30pm AEDT, should you have any questions. To contact us please use the live chat function on this page, email [email protected] or call us on (02) 4225 9698.
You can also visit Freckle Help to learn how to best use Freckle to reach all of your students.
Looking for more assistance with new year rollover?
Contact the Renaissance team on +61 2 4225 9698